Basic Level
In order to use Encrypted Checkout you will need an account in our system first, if you do not have an account yet, please reach out to your processing team to get your account active.
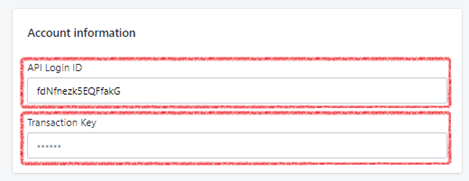
Once you have your account credentials you can get started by adding Encrypted Checkout to your Shopify store. Your credentials will look like this:
API Login ID: fdNfnezk5EQFfakG
Transaction Key: vg59p4vjTF7SyxYmT7rg4War
Basic Level Installation
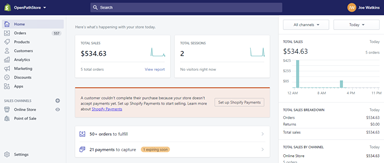
Login to your Shopify store | Goto your Shopify store at https://[YOURSTORENAME].myshopify.com/admin and login. |
 | |
Go to Settings | In the lower left side of you menu bar, click on settings, which will take you to the Shopify settings screen. |
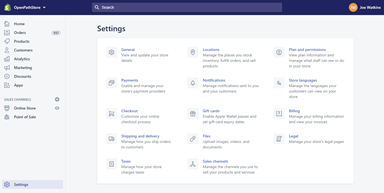 | |
Go to Payments | In the Settings box locate Payments - Enable and manage your store’s payment providers and click that link. |
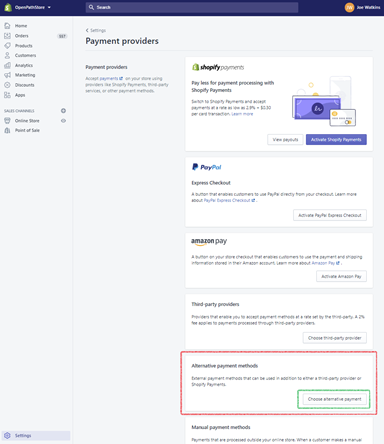 | |
Go to the Alternative payment methods section | In the Payment providers section, scroll down until you see the Alternative payment methods section and click on the Choose alternative payment button. |
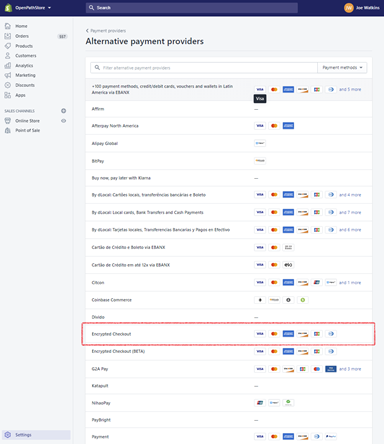 | |
Select Encrypted Checkout | In the Alternative payment providers, locate the provider name Encrypted Checkout and click on that link. |
Manually add Encrypted Checkout | If Encrypted Checkout is not in the list you can manually add it by copying the following URL and pasting it in the URL of a browser where you are already logged in to the admin of your store. https://www.shopify.com/login?redirect=%2Fadmin%2Fauthorize_gateway%2F1054793 |
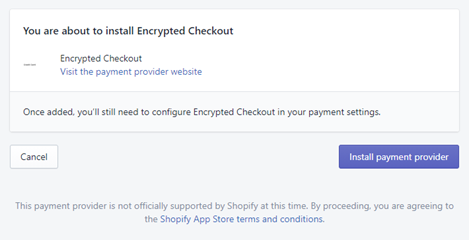 | |
To finish adding Encrypted Checkout to your available Alternative payment providers click on Install payment Provider and then finish the steps above. | |
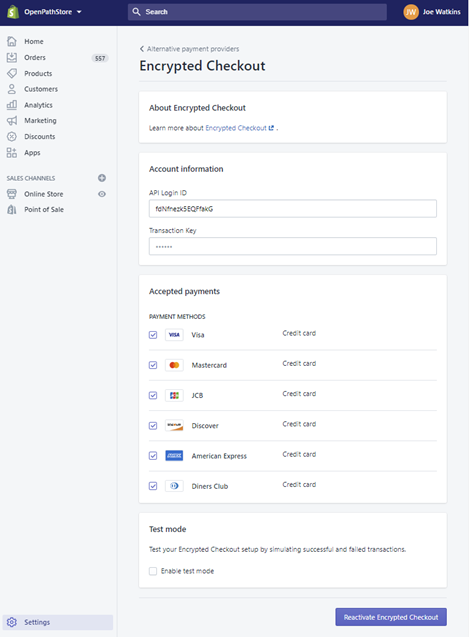 | |
Enter your Account Information | Enter the account information supplied by your payment processor or Encrypted Checkout in the API Login ID and Transaction Key in the appropriate fields and click Activate Encrypted Checkout. |
 | |
Verify Installation | That’s it, Encrypted Checkout is ready to go. To verify everything is working, add an item to your card and proceed to the checkout process all the way up to the payment page. |
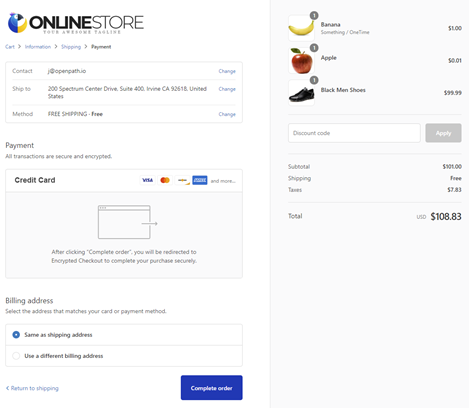 | |
If everything was setup correctly, you should see the screen above that says Credit Card. If there are other payment methods active as well you will see them too. If you do not want any of the other payment methods, you can go back to the Settings | Payments and remove those now that you have verified the installation. | |
Final Screen | If you now click Complete order, you will be directed to the final payment page. |
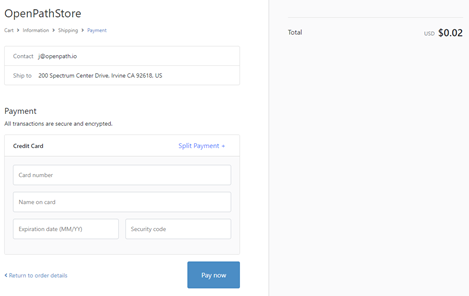 | |
That’s it you are now ready to start processing Credit Cards and use Split Payments through Shopify. If you want more control over your Encrypted Checkout payment page, please checkout out the Professional Level Installation Steps. |
Was this article helpful?
That’s Great!
Thank you for your feedback
Sorry! We couldn't be helpful
Thank you for your feedback
Feedback sent
We appreciate your effort and will try to fix the article
